➜ the-finance-dev tree
.
├── landing
├── about
├── resume
├── portfolio
│ ├── whack-a-gopher
│ ├── trailsha.pe
│ ├── sei-stay-connected
│ ├── up-kp
│ └── hardware
├── linkedin
└── github
1 directory, 10 files
➜ the-finance-dev
Since many microprocessors can run on Python, I was pretty thrilled to discover it was part of our General Assembly curriculum. You might say I immediately jumped into the deep end / took the blue pill. I ordered a better soldering station, purchased multiple NodeMCUs/microprocessors, and (no joke) ordered $1,000+ of sensors, relays, and other electrical components. I have gone down the rabbit hole, and it is amazing. What you can build with a few dollars in parts and a few lines of code is simply mind blowing. Below is a snapshot of some recent tinkering.
The classic starting place for those interested in hardware/software integration is the LED blink. I first did this with a Pi Pico (RP2040 processor), and then again with a D1 Mini (ESP8266) which has wifi.
The next baby step is often a mouse jiggler. A mouse jiggler uses a small microprocessor (another Pi Pico/RP2040 in this case) to emulate an HID mouse device. Typically they are set to "jiggle" the mouse at some interval. Common uses include keeping a machine with a short lockout period awake to avoid the hassle of repeatedly logging in, or to appear active (e.g. on Slack) while actually away (this is not recommended because your IT department can likely see it's not a real mouse!!). Law enforcement sometimes uses mouse jigglers to keep computers unlocked during a raid. They're also great devices to play jokes. Imagine your friend or coworker sits down after lunch and their cursor is moving wildly around their screen! I did this project as a stepping stone to building a macro keyboard (which mimics an HID keyboard) and can type a large volume of text simply by pressing a button. More on that later...
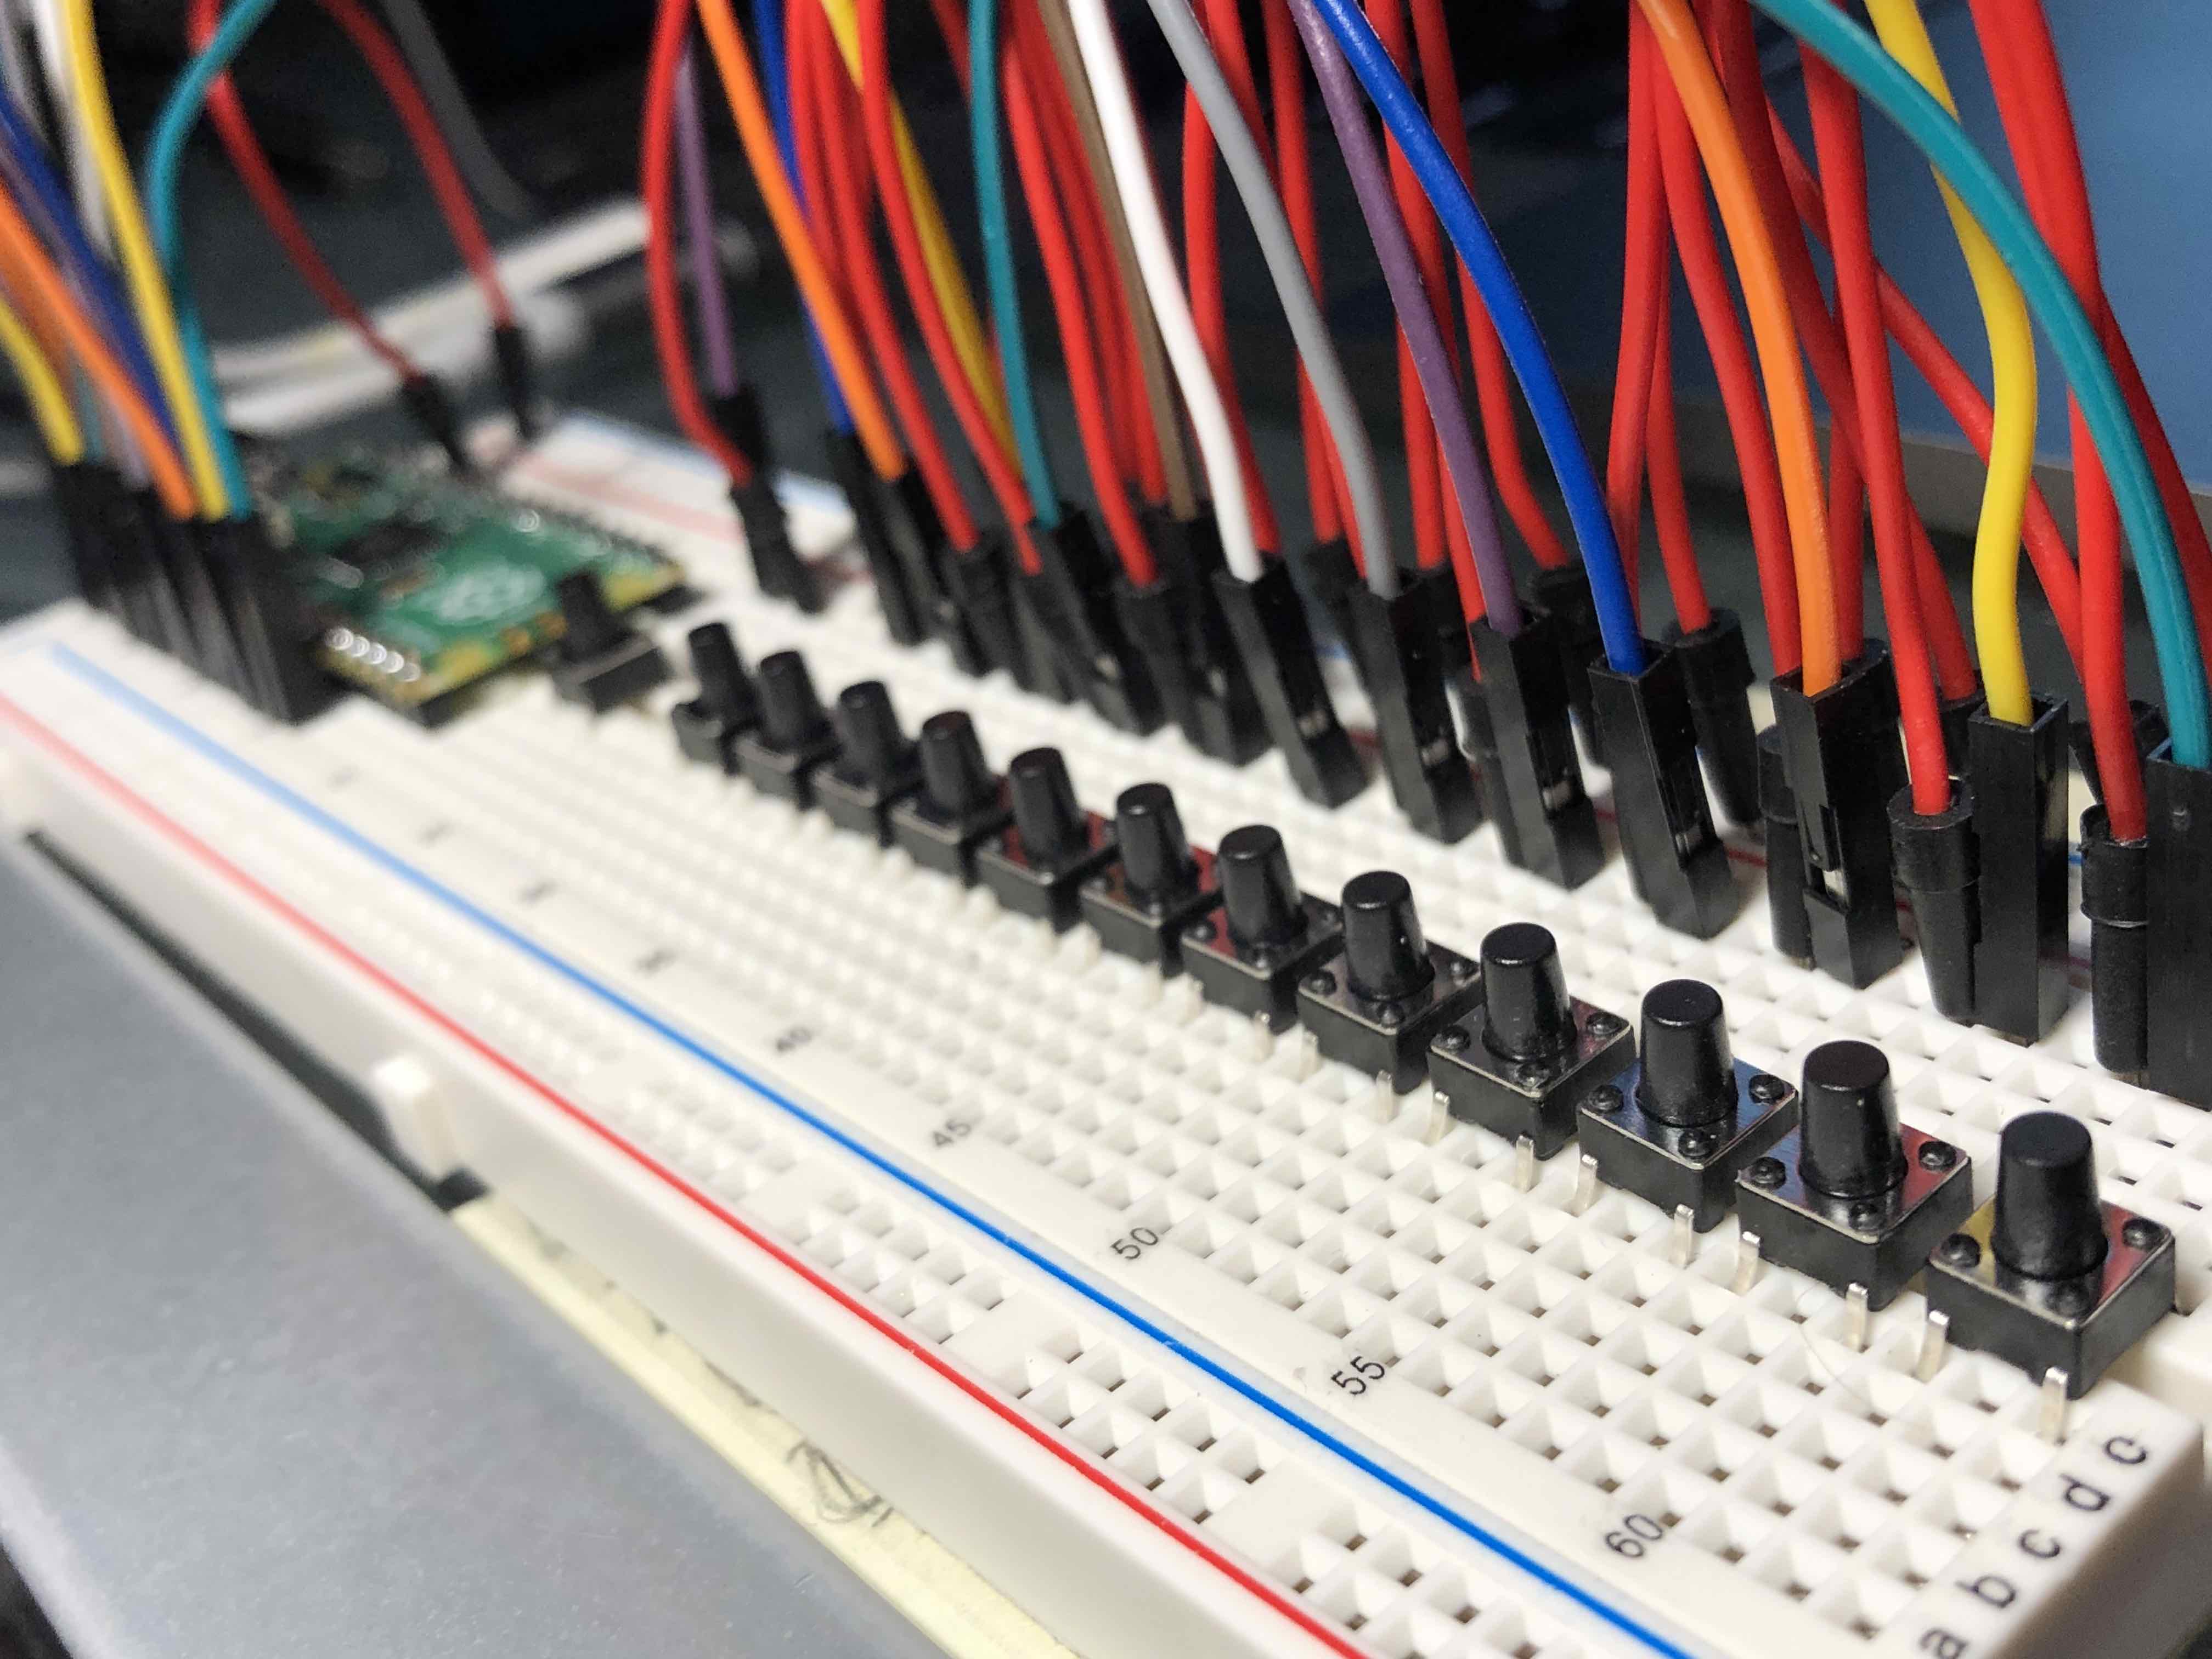
The next logical step after the mouse jiggler is a macro keyboard. Using tactile momentary buttons with the Pi
Pico/RP2040's generous number of GPIO inputs, multiple keyboard strokes can be reduced to a single button push.
With these buttons costing literally pennies each, and the controller costing only $4.00, the possibilities are
endless. I tinkered with having buttons output common form information (e.g. email, physical address, phone
number) as well as a few code examples to see if I could drop template code directly into VSCode or other editor
just by pushing a button--and it worked!
I plan to come back to this project since there are many use
cases. As a developer, imagine having hundreds of code tips and examples at your fingertips with something not
much larger than a pad of sticky notes. A potentiometer or dial could be turned to select the language / topic
/ subtopic. Then a list of commands could be displayed on an lcd screen. Need a refresher on Python data types?
Getting a question about merge sorts during your technical interview? The macro keyboard has you covered.
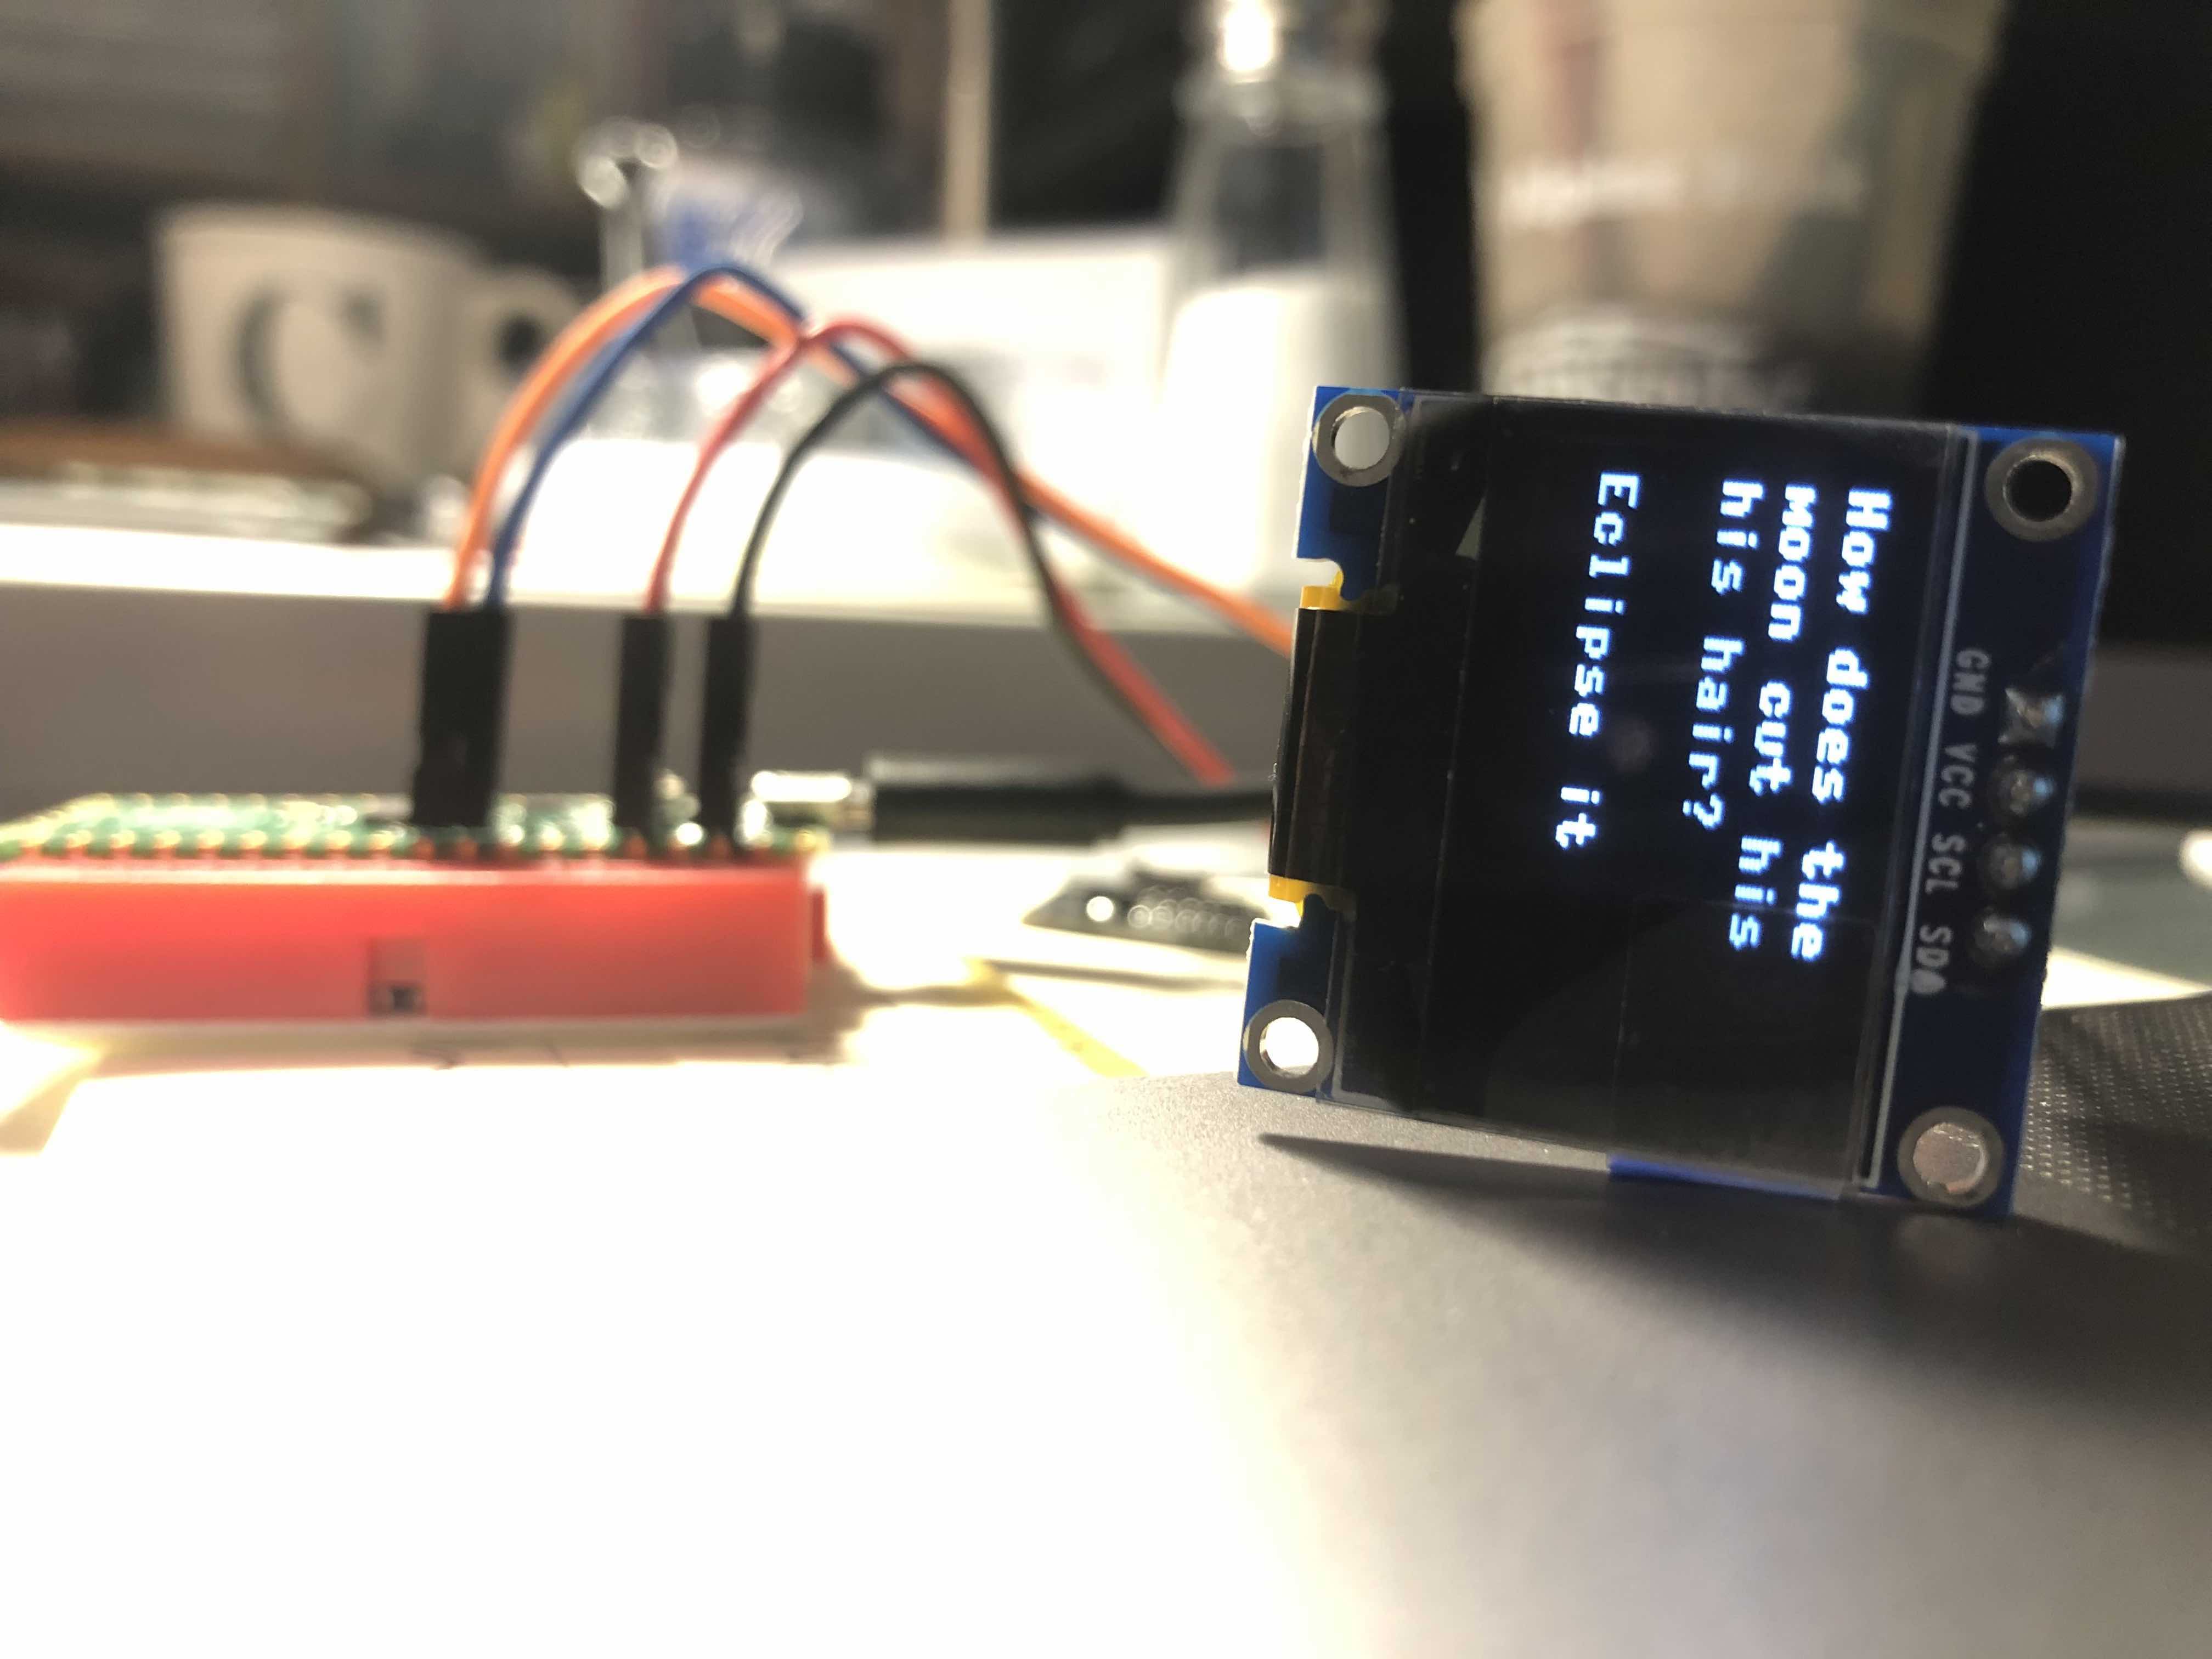
I learned how to print a short message to a common SSD1306 LCD screen (and of course tested it with a non-proofread dad joke). I'll likely make a digital magic 8 ball or pocket dad joke generator at some point to continue learning about these amazing little devices so I can use them on future, more complicated projects benefiting from a display.
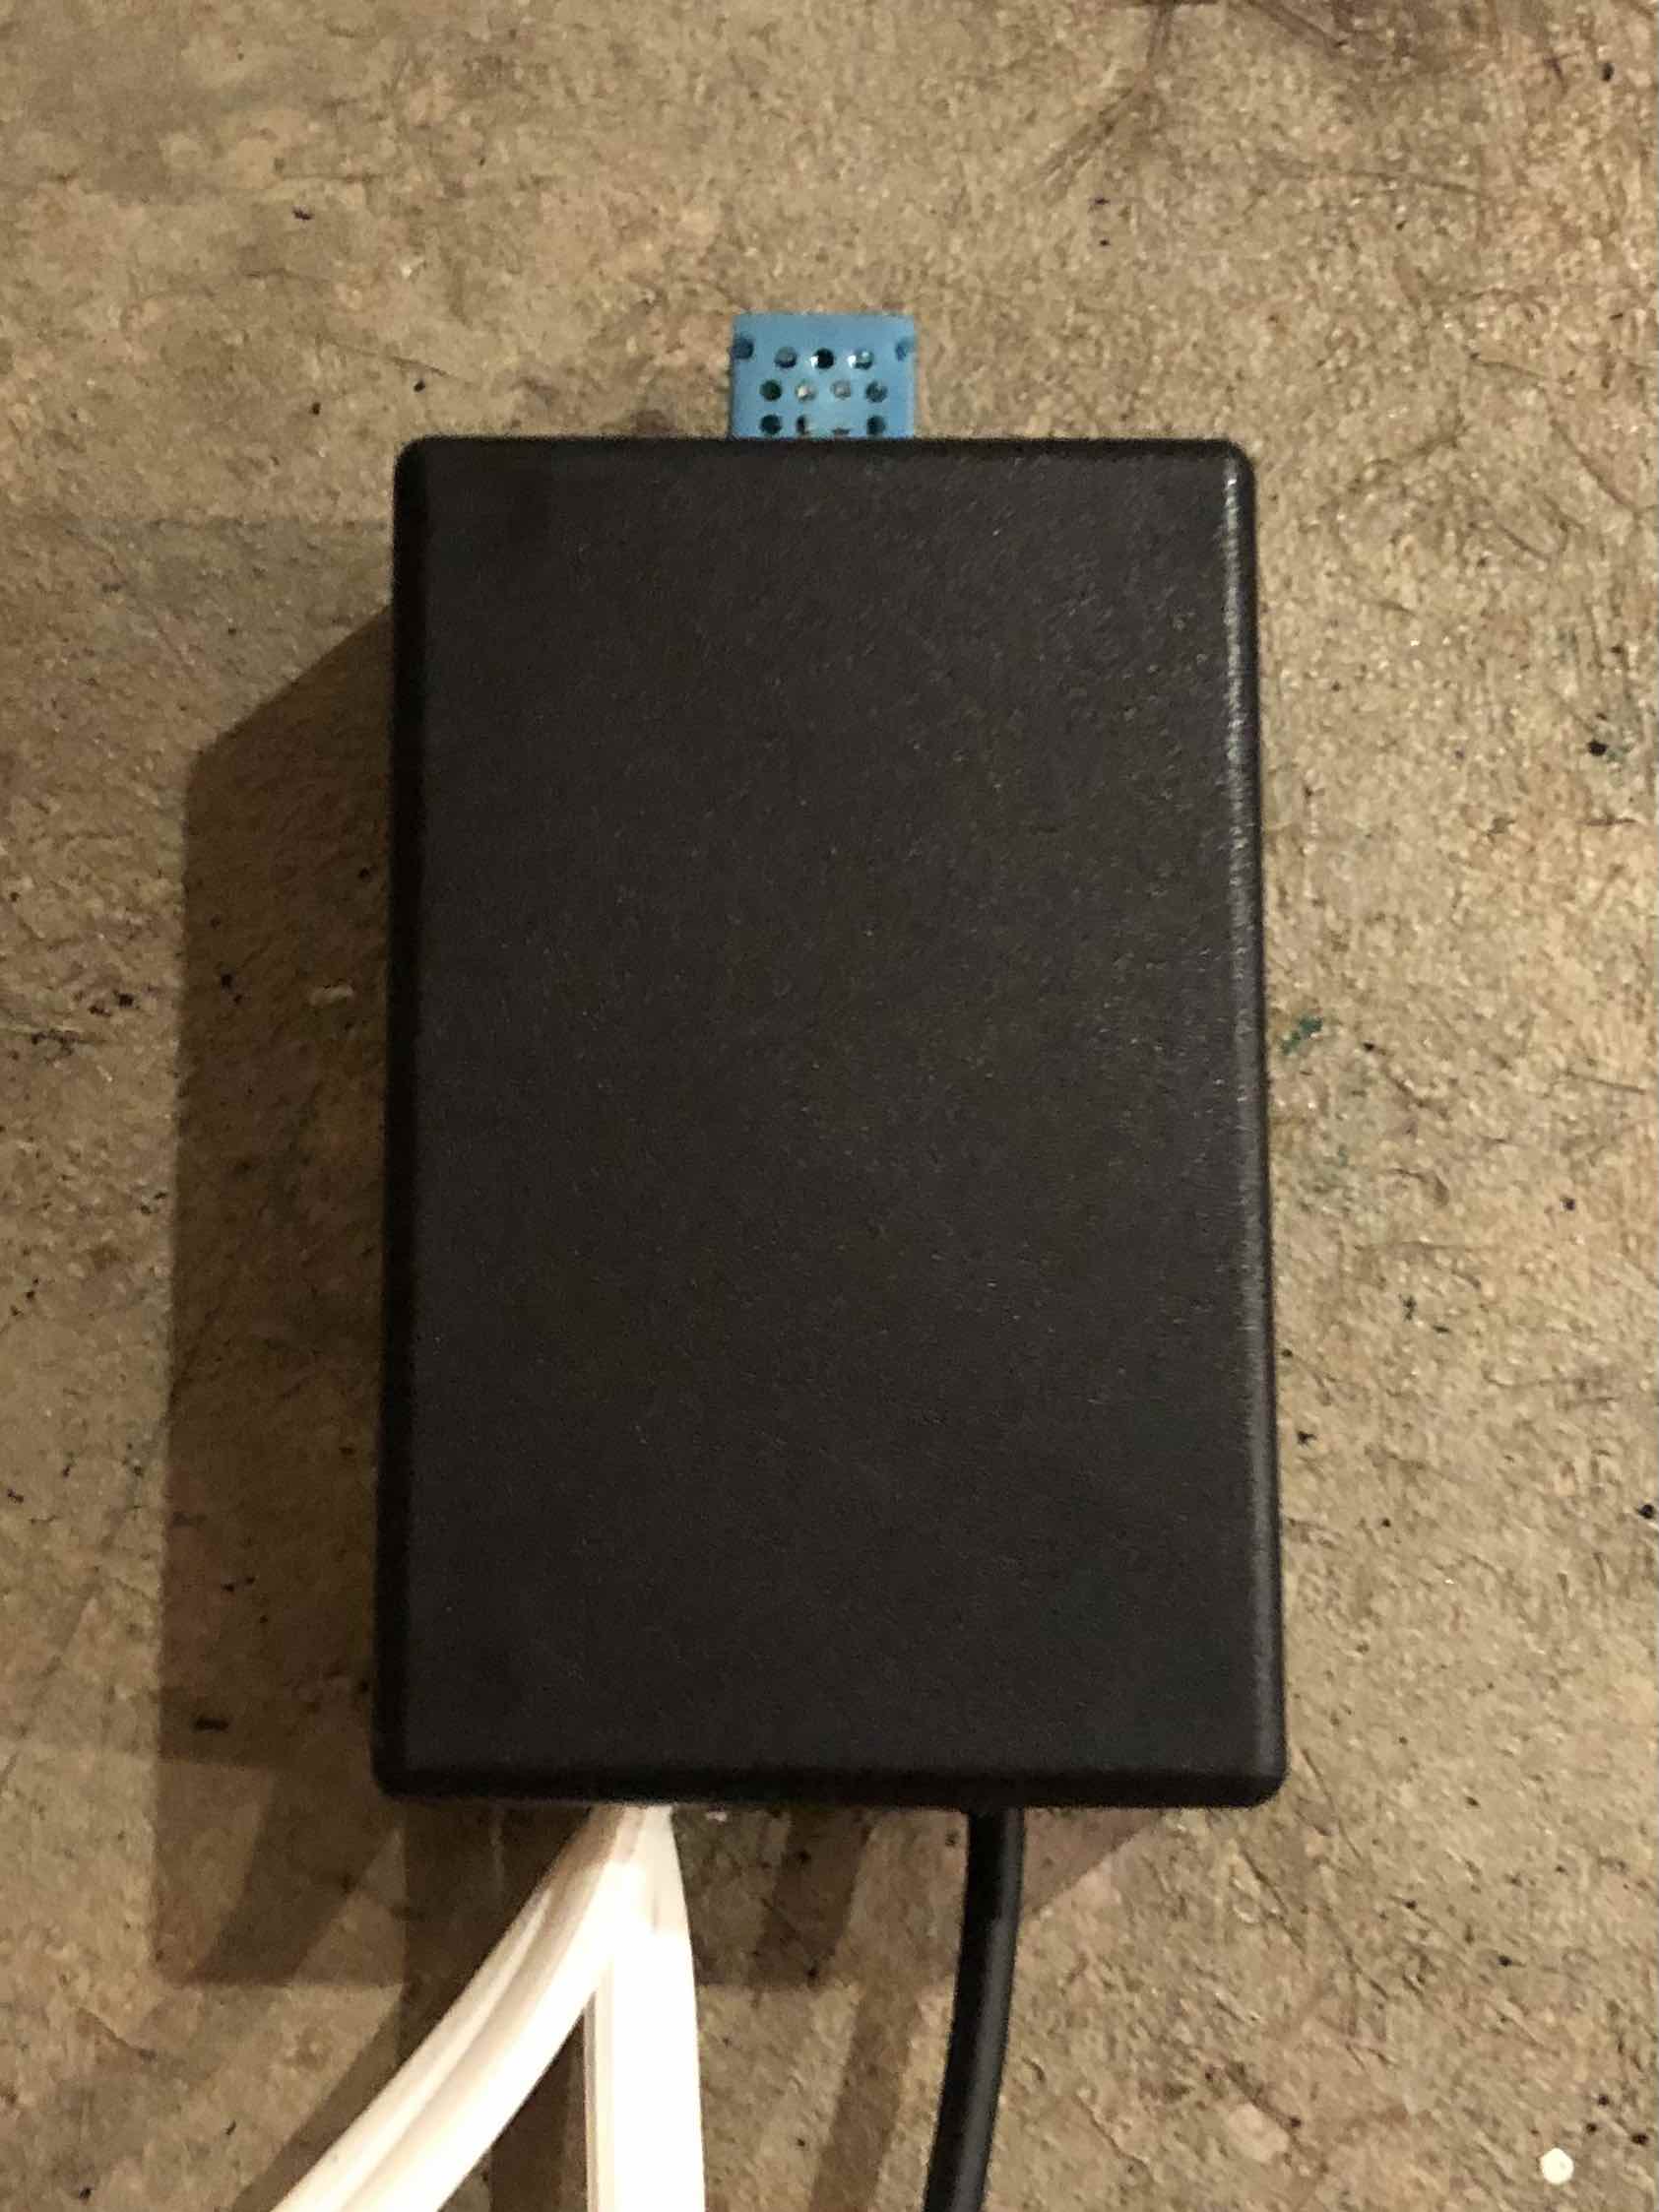
I love guitars. And I love Colorado. Unfortunately, Colorado is quite dry which can damage acoustic guitars. Using a DHT-11 digital temperature/humidity sensor, a Pi Pico/RP2040, and a relay, I built a system that monitors humidity levels and automatically controls a humidifier to keep my guitars in the happy range of 45-55% relative humidity.

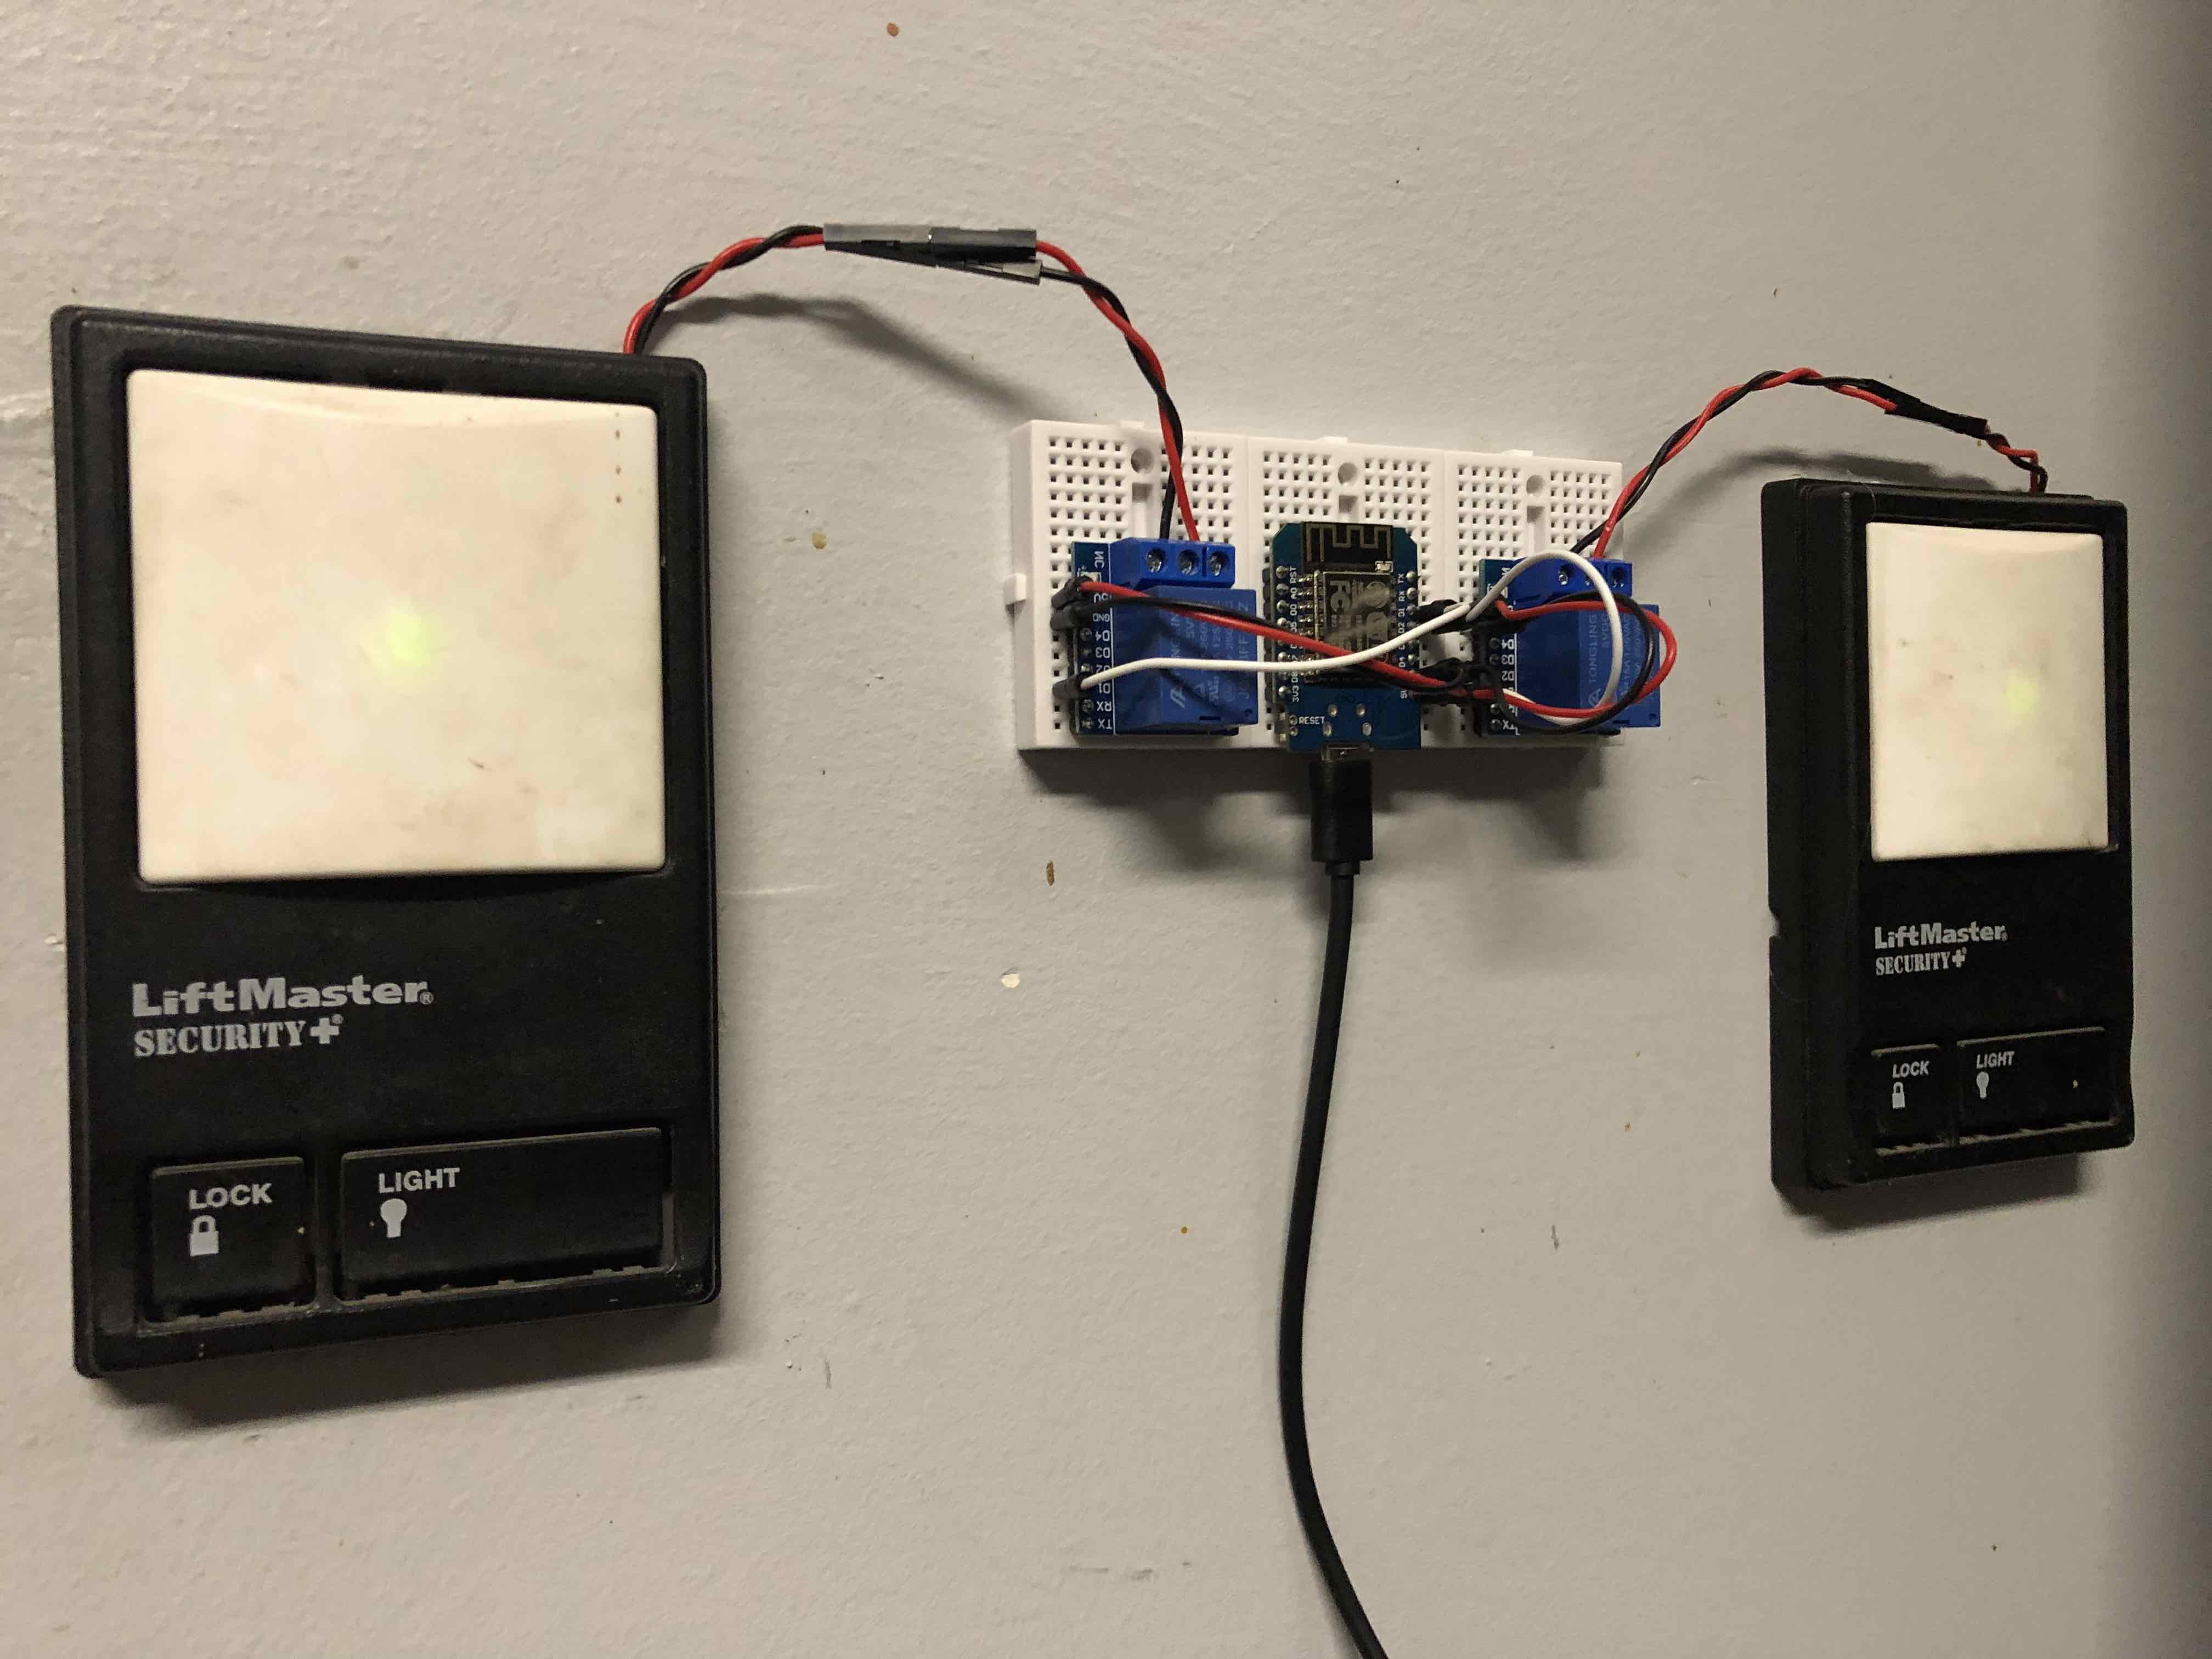
I've always wanted to be able to open and close my garage doors with my phone. With the humidifier project under
my belt and an increasing understanding of relays, it was time to give it a try. Using a D1 Mini (ESP8266) which
has wifi, I was able to connect the board to my local network and control the relays by browsing to the ip address
of the D1 Mini. When the HTML button is pushed, the normally-open relay closes for 0.4 seconds mimicking the
garage button being pushed.
This prototype has been working well and will get a nice project box soon as
well as a proper installation (by the opener--not on my wall!). I plan to add sensors for door position as well
as scheduling logic and notifications. For example, if it's 10pm and the door sensor state is open, I'll have it
send a text message (thank you, Twilio) to my wife and I letting us know it's open. I might even have it
automatically close X minutes after the text message notification has been sent.
Additionally, I'm in the
process of learning more about MQTT with the goal of having multiple DIY smart home devices on a single dashboard
(as opposed to each having its own ip address and page). I also have some other ideas that involve relays. For
example, I'd like to install these in the door panels of our vehicles so they can be opened with just our phones.
Or better yet, how cool would it be to start your car remotely on a cold morning and then get a push notification
when it's warm??